
[insert_php] global $joe_setup; [/insert_php]
Synopsis
I don’t know anyone personally including myself that can or wants to be glued to their cash phones 24/7. There are times where you will be unable to get to your devices for extended periods of time. This is why remote access is an important part of my routine.
Pretty much all of the remote access I do with my devices is done with something called VNC. VNC is a cross-platform protocol for graphically remote controlling a computer.
The only software I use that isn’t VNC based is TeamViewer.
Please note: I will use a lot of networking terms in this. Research it if you still don’t understand. I will do my best to explain it all and I will have specific demo tutorials followed by this general tutorial, but I can’t account for everyone’s setup.
Downloading Software
Two pieces of software are required to complete a VNC connection between two devices. They are VNC Servers and VNC Viewers.
VNC Servers
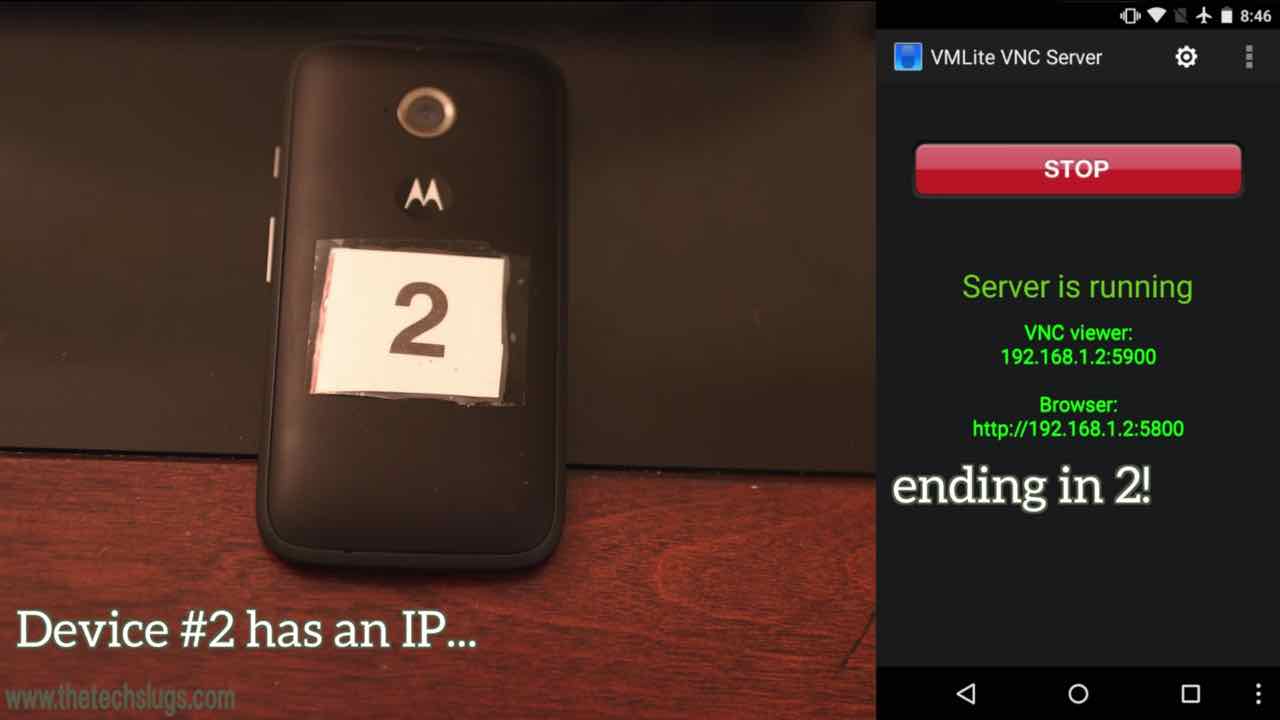
This is the piece of software that configures your device to be open for access via its IP address and port. VNC is port 5900 by default.
I use different pieces of software for each kind of device. I always configure the port number on the VNC Server for 5900 so I don’t have to enter that into the viewer.
Download this software on the device you want to control.
Windows: TightVNC
Mac: Built in Apple Screen Sharing and TeamViewer*
Android: VMLite VNC Server
iOS: Veency from Cydia
*I only have one desktop Mac. It is my main computer. This is the special case where I use TeamViewer.
VNC Viewers
This is the piece of software that allows you to access the devices with VNC Servers running by entering their internal IP address and port opened. The port doesn’t need to be entered in the viewer if it is 5900.
Although I can’t use the RealVNC Server anymore because of the changes made that are undesirable for someone with [insert_php] echo $joe_setup[‘devices’]; [/insert_php] devices, I still use the RealVNC Viewer for everything except Mac to Mac connections. RealVNC Viewer is still installed on my Mac computers for when I want to remote to iOS, Android, or Windows Computers. The Apple VNC Viewer only works well with their built-in server.
Download this software on the device you want to control other devices from.
Windows: RealVNC Viewer for Windows
Mac: Built in Apple VNC Viewer, TeamViewer Client, and RealVNC Viewer for Mac
Android: RealVNC Viewer for Android
iOS: RealVNC Viewer for iOS
Those are links of the most recent version of RealVNC, version 6 at the time of this writing.
You can also check out VNC Viewer 5 here for computer models. They work in slightly different ways so it is a matter of preference.
Download Windows: 5.3.0
Download Mac: 5.3.1
Mapping the IP Addresses
I always statically map any cash devices I put on my network. This means the IP address can’t change. My naming system for access is intuitive.
The IP range my numbered cash devices go on is 192.168.1.0 – 192.168.1.255. See other ranges below.
192.168.1.0 is my main computer.
192.168.1.1 starts the numbered devices.
The numbering goes like this:
192.168.1.[insert device ID here]
So for example device number 1 in my naming system has the IP address of:
192.168.1.1
Device number 6:
192.168.1.6
You get the idea. This keeps connecting in the VNC Viewer pretty easy after I identify the device I want to connect to in my cash devices table.
Getting More IP Addresses for Use
The available internal IP addresses on your network can be determined by looking at your subnet mask.
The default for most networks is 255.255.255.0 (also shown 192.168.1.0/24).
This gives you an internal IP range of 192.168.1.0 – 192.168.1.255, giving a maximum of 256 IP addresses.
You can still name in the way I have named my devices with this range. Just put your router on 192.168.1.0 and then name devices from there. You will, however, be a bit more limited once you factor in a range for your DHCP server and access points.
For this reason, I switched my subnet mask to 255.255.252.0 (also shown 192.168/22).
This gives me an internal IP range of 192.168.0.0 – 192.168.3.255, giving a maximum of 1024 IP addresses.
My network setup then goes as follows:
| Range | Description |
|---|---|
| 192.168.0.0 - 192.168.0.255 | Used for my router, access points, and other network utility related devices. |
| 192.168.1.0 - 192.168.1.255 | Used for my main computer (on 192.168.1.0) and all numbered devices in my routine. |
| 192.168.2.0 - 192.168.2.255 | Used for all computers that are not numbered. |
| 192.168.3.0 - 192.168.3.255 | Used for DHCP server. Any new devices connected to the network will automatically given an IP in this range and I can then manual map then if I choose. |
Obviously, I won’t use all of the IP addresses in each range (perhaps the numbered devices one) but it provides structure and an intuitive naming system.
Configuring the VPN for Outside Access
After you map your devices with static IP addresses, you can easily connect to them on your internal network.
What happens when you are on an outside network such as school or work? Typing 192.168.1.5 to access device number 5 isn’t going to work by default.
To be able to do that, you need to set up a VPN on the router of the network your devices are on.
After you set up, correctly configure, and connect to that VPN, typing 192.168.1.5 to access device number 5 will work no matter the network you are on!
Having a VPN setup has other benefits too.
Accessing the Devices
Now that you have downloaded and ran the necessary software for each kind of device and know its IP address, we can connect to it.
Follow these steps when connecting to your devices.
- Make sure VNC Server is running on the device you want to control and take note of its IP address.
- If outside the network: Connect to the VPN you previously setup for the network all the devices are on.
- Open VNC Viewer on the device you want to open a connection from.
- Enter the devices IP address, port (if not default 5900), and password to connect.
This was a general overview. Pick your device here.