This will show you how to remote control Windows computers from iOS devices.
Set Up Windows for Being Controlled
Download TightVNC here.
After download, navigate to the package and open it.
Click next and accept the terms of agreement.
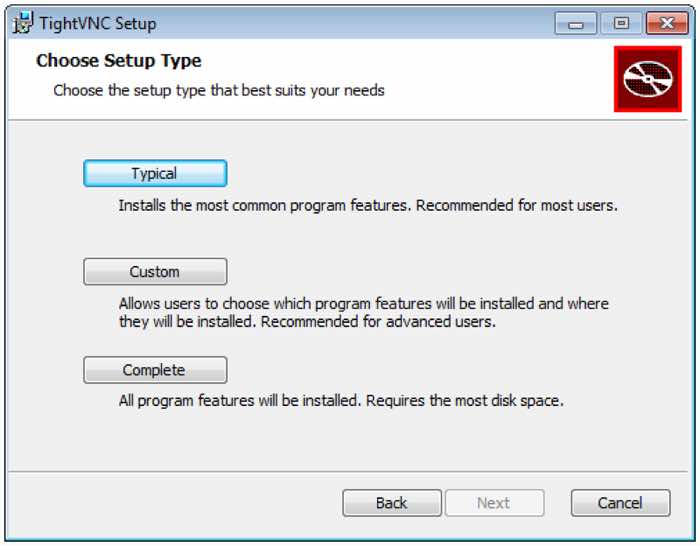
When you reach this page, click custom install.
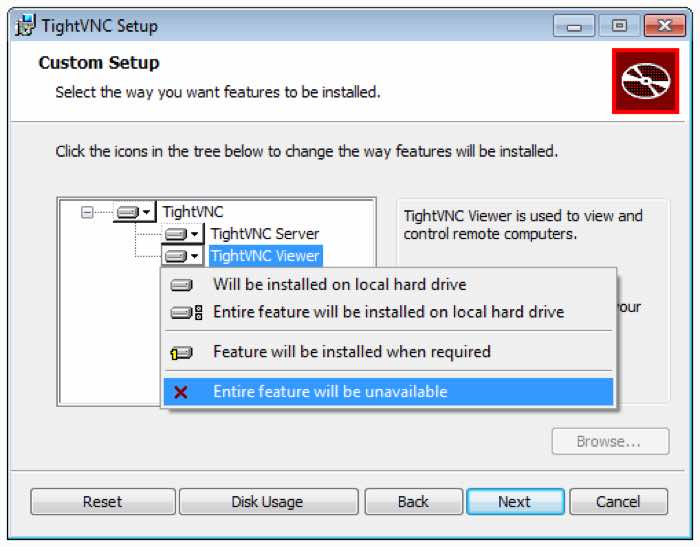
Click and deselect TightVNC Viewer from installation. We don’t need that. If you plan on also remoting to other devices via VNC on this Windows Computer, I recommend RealVNC Viewer for Windows.
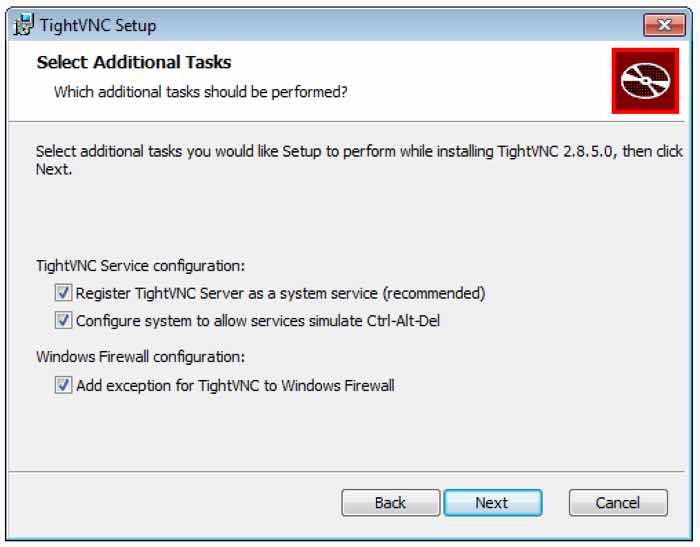
Leave all of these options checked below.
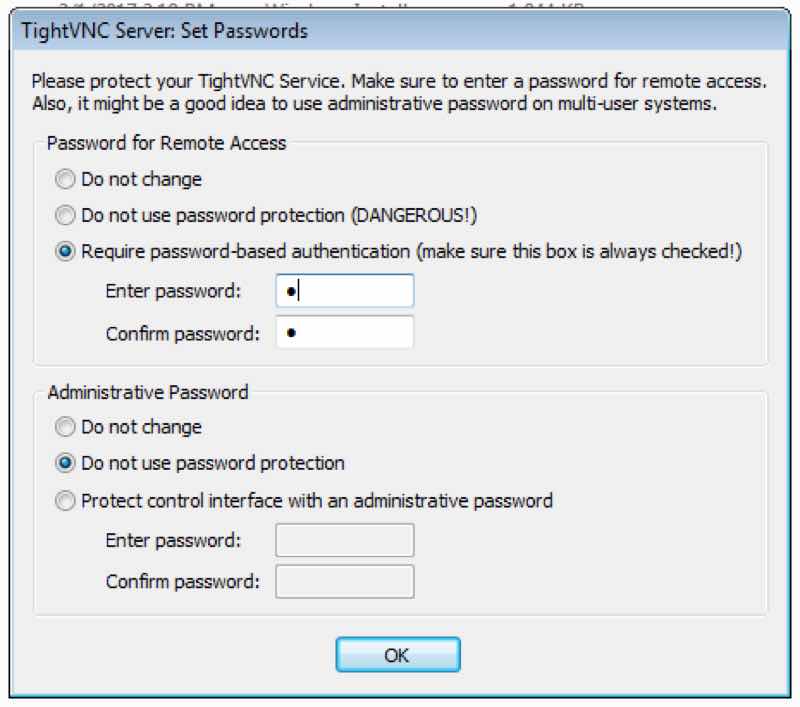
Once completed, we need to set passwords. Here is how I do it.
We need a password for remote access to work. Since we aren’t forwarding the computer for access and using a VPN to get in from outside the network, a weak password will be fine. I set “1” as my password for “Password for Remote Access.”
I set no password for “Administration Password.”
See configuration:
Click finish on the installer.
At this point, you should be done installing TightVNC Server on your Windows computer.
It should also have automatically started up and you can find it in your hidden icons down here on the taskbar:
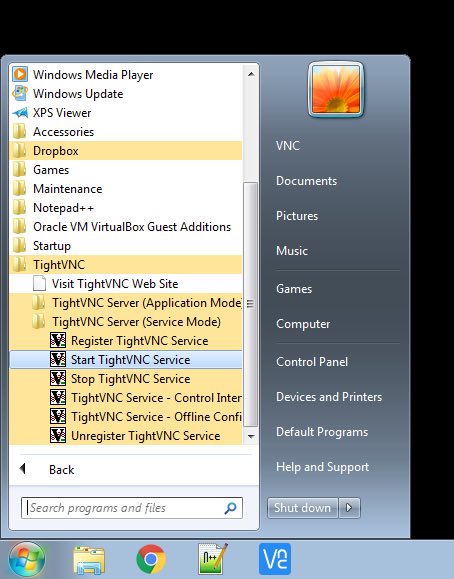
If it isn’t running, then go to your start menu > All Programs > TightVNC (or whichever directory you install all of your programs to) > TightVNC Server (Service Mode). From there, Click Start TightVNC Service.
Also, TightVNC normally starts automatically on boot up. To ensure that it does, make a shortcut of Start TightVNC Service within the startup folder on the computer.
See the number following TightVNC Service within your icons whenever hovering over TightVNC Server?
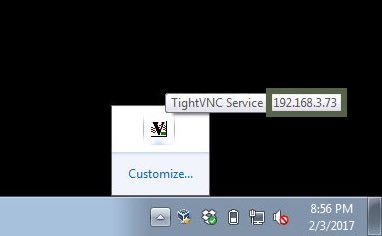
That is the IP address of your machine. Take note of that for connecting below.
Unless if you did something special prior to this in your static IP/reservations settings on your router, this was assigned automatically. I recommend static IP addresses for all of your devices.
In order to change this automatically assigned IP address into a static one to prevent it from changing again, you need to research your router model to learn how to change this setting within your router settings.
Now we can connect!
Demo
Set Up iOS for Controlling
Download VNC Viewer for iOS here.
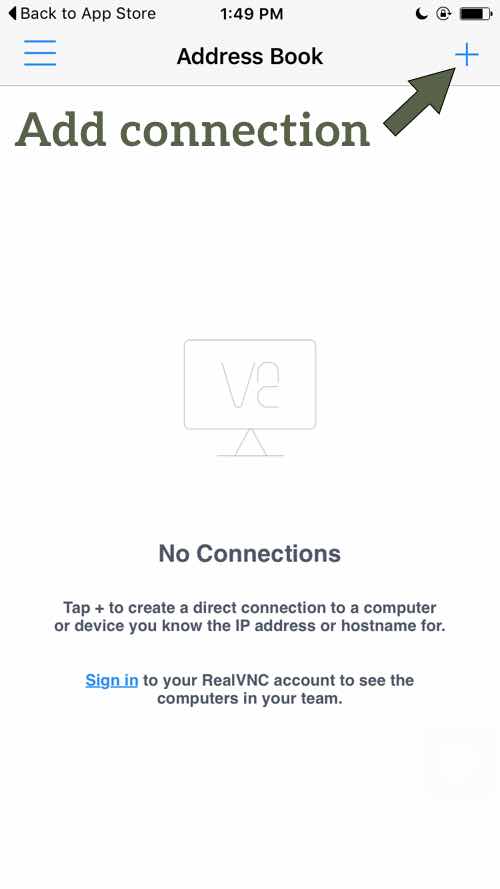
Once downloaded and opened, click add connection in the top right.
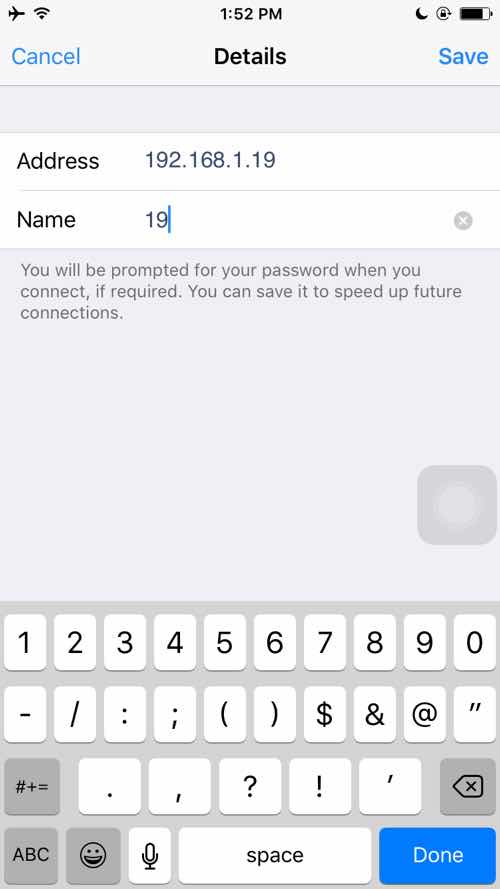
Enter the IP of the device you want to control. Click save.
Put in a friendly name below the IP address (e.g. 19 for device #19).
I usually name mine according to my cash device naming system.
Set the picture quality to low for speed and click connect.
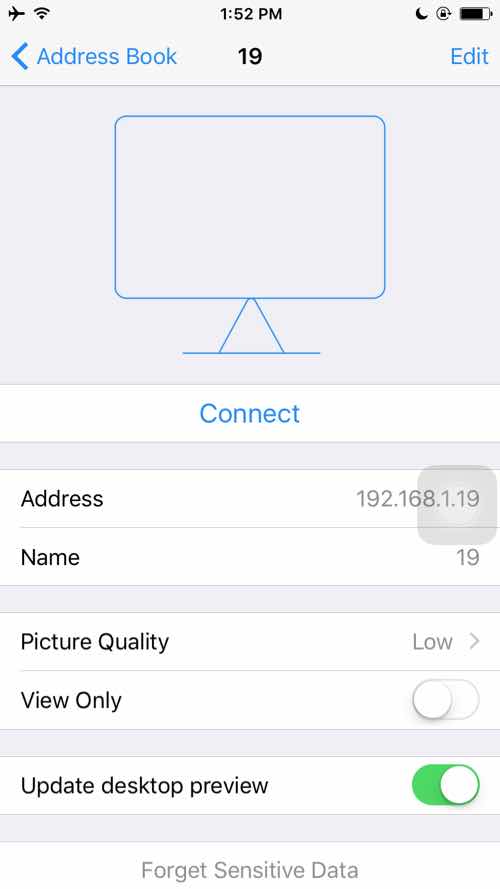
It will warn you if you want to connect without encryption. Turn off the warning.
Enter the password and slide remember password to on.
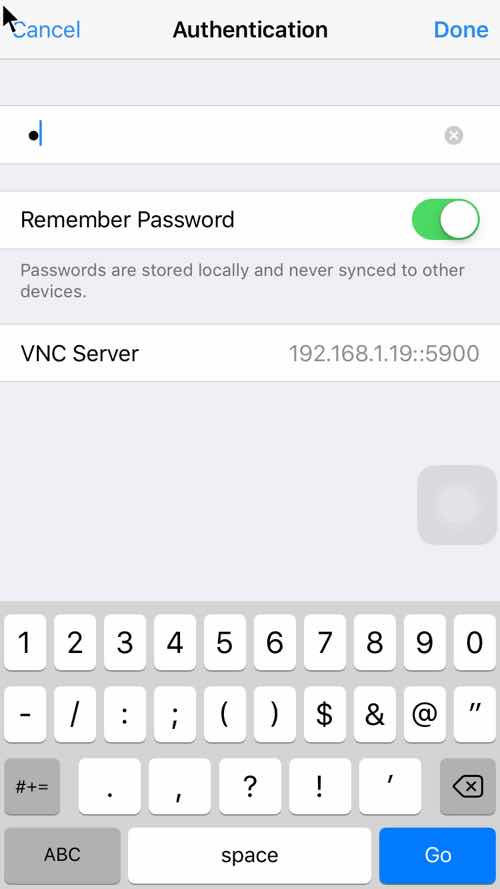
You are now connected!
Controlling from Outside Your Network
In order to control this device from outside the network, I recommend setting up a VPN on your router. You can then use the same IP address you used above to connect to the machine as long as you are connected to your router via the VPN on the device controlling.
I will have an example soon on how I set up a VPN with my router, but how you can set up a VPN on your router depends on your model. Every UI is different. You will have to research your model for how to set up a VPN on it.
